
| Rubrik: Grafik und Font · Sonstiges | VB-Versionen: VB5, VB6 | 29.11.07 |
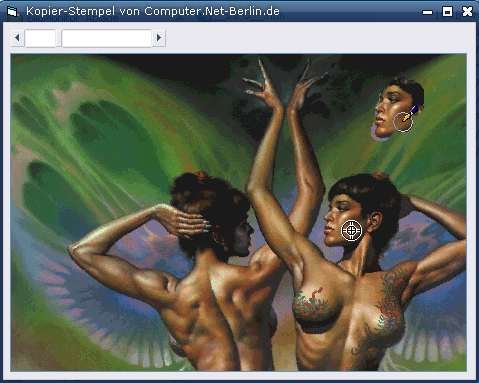
 Eine Grafik mit Kopier-Stempel bearbeiten Eine Grafik mit Kopier-Stempel bearbeitenMit dem Kopier-Stempel können Sie Ausschnitte aus einem Bild mit dem Pinsel auf eine andere Stelle im Bild übermalen. | ||
| Autor: | Bewertung: | Views: 9.082 |
| computer.net-berlin.de | System: Win9x, WinNT, Win2k, WinXP, Win7, Win8, Win10, Win11 | |
Das nachfolgende Beispiel zeigt, wie man mit einem "Kopier-Stempel" Ausschnitte aus einem Bild mit dem Pinsel auf eine andere Stelle im Bild übermalen kann.
Erstellen Sie ein neues Projekt, platzieren auf die Form ein HScroll-Control (HScroll1), eine PictureBox (picDummy) mit Visible = False und darunter eine weitere PictureBox (Picture1) mit ScaleMode = "3 - Pixel". Setzen Sie ferner auch noch die ScaleMode-Eigenschaft der Form auf "3 - Pixel".
Fügen Sie dem Projekt jetzt ein neues Modul mit nachfolgenden Code hinzu:
Option Explicit

' benötigte API-Deklarationen
Public Declare Function SetPixel Lib "gdi32" ( _
  ByVal hDC As Long, _
  ByVal X As Long, _
  ByVal Y As Long, _
  ByVal crColor As Long) As Long

Public Declare Function GetPixel Lib "gdi32" ( _
  ByVal hDC As Long, _
  ByVal X As Long, _
  ByVal Y As Long) As Long

Public TargetX As Single
Public TargetY As Single
Public kStempel As Boolean
Public sysTarget As Boolean
Public Sub KorrFilter(ByRef Pic As PictureBox, _
  Optional x1 As Long = -1, Optional y1 As Long = -1, _
  Optional x2 As Long = -1, Optional y2 As Long = -1, _
  Optional xtg As Single = 0, Optional ytg As Single = 0, _
  Optional Grad As Integer = 8)

  Dim intDrawMode As Integer
  Dim lngReadColor As Long
  Dim lngWriteColor As Long
  Dim Rs As Long
  Dim Gs As Long
  Dim Bs As Long
  Dim X As Single
  Dim Y As Single

  On Error GoTo ErrorHandler

  If (x1 = -1) And (y1 = -1) And (x2 = -1) And (y2 = -1) Then Exit Sub

  With Pic
    intDrawMode = .DrawMode
    .DrawMode = vbCopyPen

    Dim xMid As Single, yMid As Single
    If x1 < x2 Then
      xMid = x1 + ((x2 - x1) / 2)
    Else
      xMid = x2 + ((x1 - x2) / 2)
    End If
    If y1 < y2 Then
      yMid = y1 + ((y2 - y1) / 2)
    Else
      yMid = y2 + ((y1 - y2) / 2)
    End If

    For X = x1 To x2
      For Y = y1 To y2
        If radiusAF(xMid, yMid, X, Y) < Grad Then ' Für Rundung
          lngReadColor = GetPixel(.hDC, X + xtg, Y + ytg)
          GetRGBColor lngReadColor, Rs, Gs, Bs
          lngWriteColor = RGB(Abs(Rs), Abs(Gs), Abs(Bs))
          SetPixel .hDC, X, Y, lngWriteColor
        End If
      Next Y
      Pic.Refresh
    Next X

    .DrawMode = intDrawMode
    .Refresh
  End With

ErrorHandler:
End Sub
' Radiuswert aus zwei Koordinatenpaaren ermitteln
Private Function radiusAF(x1!, y1!, x2!, y2!) As Single
  Dim A As Single
  Dim B As Single

  On Error Resume Next
  A = Abs(x1! - x2!)
  B = Abs(y1! - y2!)
  radiusAF = Sqr(A * A + B * B)
End Function
' RGB Farbwerte ermitteln
Private Sub GetRGBColor(lngColor As Long, ByRef Rs As Long, _
  ByRef Gs As Long, ByRef Bs As Long)

  On Error GoTo ErrorHandler

  Rs = lngColor Mod 256
  Gs = (lngColor \ 256) Mod 256
  Bs = (lngColor \ 256) \ 256

ErrorHandler:
End Sub
Öffnen Sie die Form und laden in die PictureBox "Picture1" ein beliebiges Bild. Platzieren Sie jetzt noch ein Image-Control in die PictureBox benennen es "imgTarget" und setzen die
Visible-Eigenschaft auf False. Der Picture-Eigenschaft weisen Sie folgendes Symbol zu:  . Jetzt bitte noch ein Shape-Control in die
PictureBox platzieren und folgende Eigenschaften festlegen: Name=shCircle, DrawMode=6-Invers, Height=25, Shape=3-Kreis, Width=26, Visible=False.
. Jetzt bitte noch ein Shape-Control in die
PictureBox platzieren und folgende Eigenschaften festlegen: Name=shCircle, DrawMode=6-Invers, Height=25, Shape=3-Kreis, Width=26, Visible=False.
Fügen Sie nachfolgenden Code in den Codeteil der Form:
Option Explicit

Private Sub Form_Load()
  kStempel = True
End Sub

Private Sub Form_KeyDown(KeyCode As Integer, Shift As Integer)
  ' KeyEvents an Picture1 weiterleiten
  Picture1_KeyDown KeyCode, Shift
End Sub

Private Sub Form_KeyUp(KeyCode As Integer, Shift As Integer)
  ' KeyEvents an Picture1 weiterleiten
  Picture1_KeyUp KeyCode, Shift
End Sub

Private Sub Form_MouseMove(Button As Integer, Shift As Integer, _
  X As Single, Y As Single)

  ' Shape (Kreis) ausblenden
  shCircle.Visible = False
End Sub
Private Sub imgTarget_MouseMove(Button As Integer, Shift As Integer, _
  X As Single, Y As Single)

  ' Shape (Kreis) ausblenden
  shCircle.Visible = False
End Sub
Private Sub Picture1_KeyDown(KeyCode As Integer, Shift As Integer)
  With Picture1
    If KeyCode = vbKeyMenu And kStempel Then
      .MousePointer = 99
      .MouseIcon = PicDummy.MouseIcon ' Target
      sysTarget = True
      shCircle.Visible = False
    End If
  End With
End Sub

Private Sub Picture1_KeyUp(KeyCode As Integer, Shift As Integer)
  With Picture1
    If sysTarget Then
      .MousePointer = 99
      .MouseIcon = PicDummy.DragIcon ' Pinsel
      sysTarget = False
      shCircle.Visible = True
    End If
  End With
End Sub

Private Sub Picture1_MouseDown(Button As Integer, Shift As Integer, _
  X As Single, Y As Single)

  If kStempel And Not (sysTarget Or imgTarget.Visible) Then ' Stempel
    MsgBox "Bitte erst den Kopier-Stempel auf den gewünschten" & vbCrLf & _
      " Bereich mit der Taste Alt setzten!", vbInformation, "Kopier-Stempel"
    Exit Sub
  End If

  If sysTarget And Button = 1 Then ' Stempel
    imgTarget.Left = X - 16: imgTarget.Top = Y - 16
    imgTarget.Visible = True
    TargetX = X: TargetY = Y
    Exit Sub
  End If

  Picture1.AutoRedraw = True

  If kStempel Then
    If imgTarget.Visible Then
      TargetX = TargetX - X
      TargetY = TargetY - Y
    Else
      TargetX = 0
      TargetY = 0
    End If
  End If

  ImageFilter CLng(X), CLng(Y)
End Sub

Private Sub Picture1_MouseMove(Button As Integer, Shift As Integer, _
  X As Single, Y As Single)

  If sysTarget And Button = 1 Then Exit Sub

  If Button = 1 Then
    If imgTarget.Visible Then
      imgTarget.Left = X + TargetX - 16
      imgTarget.Top = Y + TargetY - 16
    End If
    ' Dunkel  (ApplyFilter-ModPicGrafik)
    ImageFilter =CLng(X), CLng(Y)
  End If

  With shCircle
    .Visible = True
    .Width = HScroll1.Value
    .Height = shCircle.Width
    .Left = X - HScroll1.Value / 2
    .Top = Y - HScroll1.Value / 2
  End With
End Sub

Private Sub Picture1_MouseUp(Button As Integer, Shift As Integer, _
  X As Single, Y As Single)

  If kStempel And Not (sysTarget Or imgTarget.Visible) Then
    Exit Sub    ' Stempel
  End If
  If sysTarget And Button = 1 Then Exit Sub

  If kStempel Then
    If imgTarget.Visible Then
      TargetX = imgTarget.Left + 16
      TargetY = imgTarget.Top + 16
    End If
  End If
  Picture1.AutoRedraw = False
End Sub
Private Sub ImageFilter(Optional X As Long = -1, Optional Y As Long = -1)
  On Error GoTo ErrorHandler

  Dim Pic As PictureBox
  Dim x1 As Long
  Dim y1 As Long
  Dim x2 As Long
  Dim y2 As Long
  Dim intDrop As Integer

  intDrop = HScroll1.Value / 2

  If ((X <> -1) Or (Y <> -1)) Then
    x1 = X - intDrop
    y1 = Y - intDrop
    x2 = X + intDrop
    y2 = Y + intDrop
    If (x2 >= 0) And (y2 >= 0) Then
      KorrFilter Picture1, x1, y1, x2, y2, TargetX, TargetY, intDrop
    End If
  End If

ErrorHandler:
End Sub
